CSCI 345: Lab 4
Intro
to
Arduino
Due:
10PM
on
Monday,
March 9th
In this lab, you should learn:
- How to program arduinos
- How to control LEDs with your arduino
To complete this lab, you will need:
- A computer.
- An arduino.
- A USB cable to connect your arduino to your computer.
- Three or more LEDs.
- Three or more 270 Ω resistors, a 470 Ω resistor, a 2.2 kΩ, and a 10 kΩ resistor, or resistors in the closest values you have.
- A breadboard.
- Wires.
Part 0 - Github
To create the github repo for this lab, click here
Part 1 - Setting Up the Arduino Software
Follow this guide to set up the arduino IDE on your computer, and get your computer talking to your arduino. After this, you should be able to load the blink program to your arduino, and see your onboard LED blink.
This guide asks you to use
different sizes of resistors. If you do not have
the exact size resistor it calls for, use the
closest size you have. To tell a resistor's
value, you can read its colored bands. A guide on
how to do this is available here.
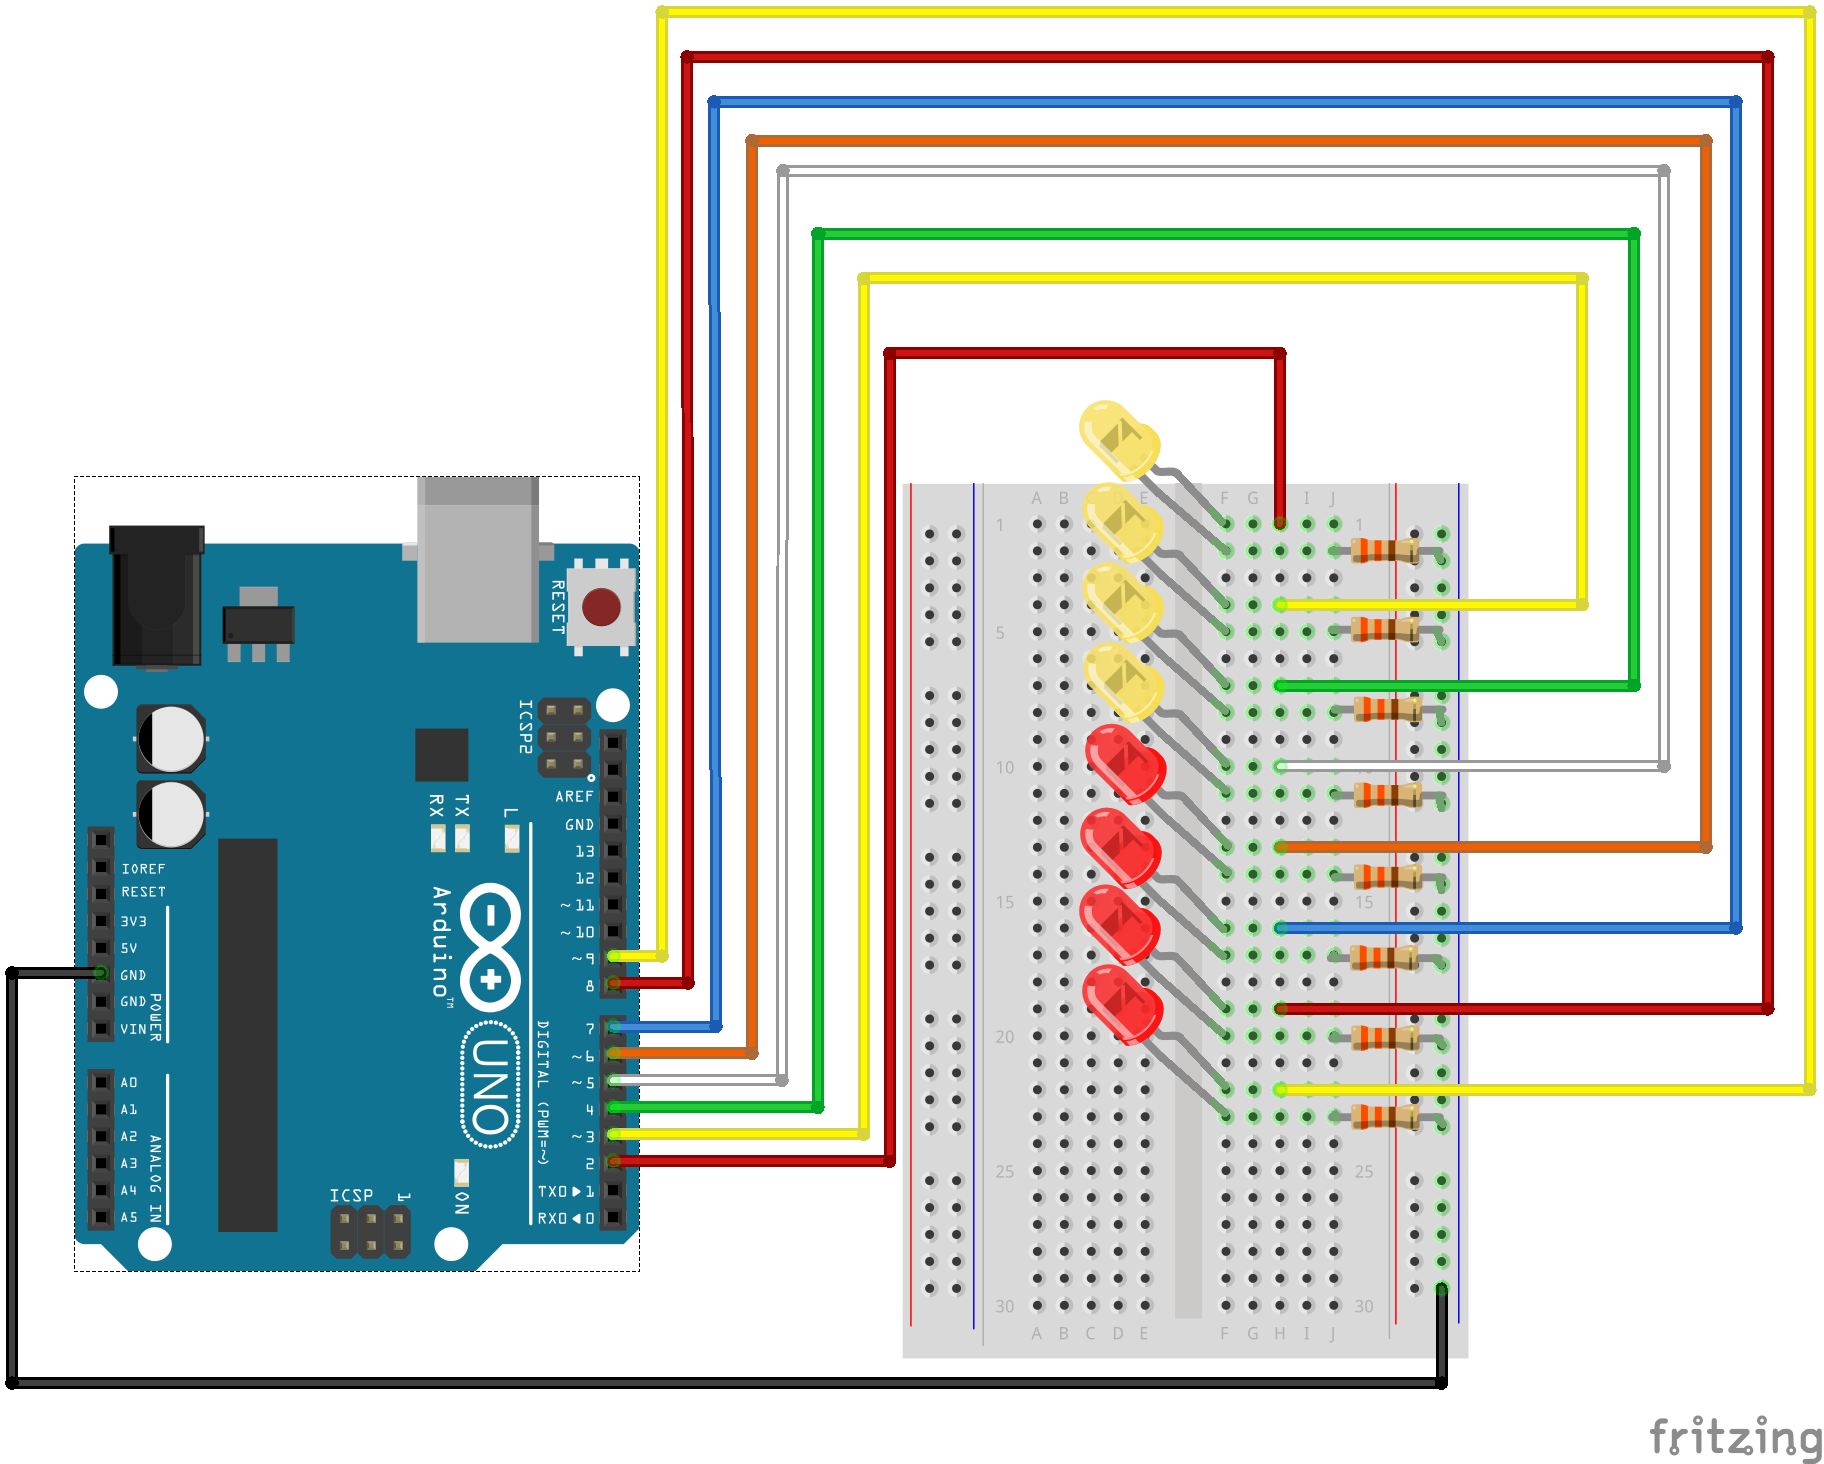
First, connect at least three LEDs to your arduino. To do this, each
LED will connect to its own output pin, but they will
all share the same ground pin. This will look
something like the image below.
Now, write a program that blinks your LEDs in some interesting
pattern. This pattern should include both multiple LEDs being on at
the same time, and LEDs being turned on and off one at a time.
You will submit your assignment by posting a
comment on the piazza thread for lab 4. Your post
should include a link to the a video of your LEDs
blinking, and a link to a github repository that
contains your arduino code.
Part 2 - Editing Arduino Programs
Follow
this guide to edit the blink program and change
the speed at which your onboard LED blinks. After
this, you should be able to edit arduino programs
and see the resulting changes run on your board.Part 3 - Blinking a LED
Follow this
guide to controling an LED that is not built
into your arduino.Part 3 - Blinking multiple LEDs
Now you will take what you learned in the previous parts of the lab,
and use it to blink multiple LEDs in the pattern of
your choosing.
image courtesy of sparkfun.com
Handin
C. Taylor