Setup for Lab Software
On this page, we provide instructions for setting up the software needed to complete lab assignments on your personal computer for both macOS and Windows. We also provide instructions for working with GitHub Desktop to add, commit, and push your files (as well as pull to download the latest version, in case you are working on multiple computers). Finally, we also briefly describe to how to compile and run your Java programs using either Terminal (for macOS) or Powershell (for Windows).
You can use these links to jump to the different instructions below:
- Installation instructions for macOS
- Installation instructions for Windows
- Using GitHub Desktop
- Compiling and Running Java Programs
Installation instructions for macOS
Installing Java
First, we need to install the Java Development Kit (JDK) so that we can both run and compile Java programs on our computers. There are multiple versions of Java available; I recommend version 17, which you can download here: https://www.oracle.com/java/technologies/javase/jdk17-archive-downloads.html.
After clicking on the link, scroll down to "macOS x64 DMG Installer" and click on the link to its right to download the Java 17 JDK. Once it is downloaded, go to the Downloads folder on your Mac, double click on the downloaded .dmg file, and follow the instructions on the screen to install the JDK.
Installing Visual Studio Code
Next, we need to install Visual Studio Code as our Integrated Development Environment (IDE) so that we can create and edit Java files. Go to the Visual Studio Code download webpage: https://code.visualstudio.com/download. If you have a newer Mac (with an M1 or M2 processor), I'd recommend clicking on the "Apple Silicon" button on the right side of the screen, next to the text ".zip", but the "Mac" button under the Apple symbol on the right side of the screen will work for everyone.
Once the file is downloaded, go to your Downloads folder on your Mac, double click on the zip file to unzip the application, and finally double click on the "Visual Studio Code" application to run it.
Please refer back to the instructions in the Warmup from Lab 1 to setup Visual Studio Code to work for our class: https://cs.oberlin.edu/~cs151/lab-1/w-part-3/
Installing GitHub Desktop
First, download GitHub Desktop on this webpage: https://desktop.github.com. If you have a newer Mac (with an M1 or M2 processor), I'd recommend clicking on the link "Download for an Apple Silicon Mac", but the "Download for macOS" button will work for everyone. Go to your Downloads folder, double click on the downloaded zip file to unzip the application, then double click on the "GitHub Desktop" application.
Installation instructions for Windows
Installing Java
First, we need to install the Java Development Kit (JDK) so that we can both run and compile Java programs on our computers. There are multiple versions of Java available; I recommend version 17, which you can download here: https://www.oracle.com/java/technologies/javase/jdk17-archive-downloads.html.
After clicking on the link, scroll down to "Windows x64 MSI Installer" and click on the link to its right to download the Java 17 JDK. Once it is downloaded, go to the Downloads folder on your computer, double click on the downloaded .msi file, and follow the instructions on the screen to install the JDK.
Installing Visual Studio Code
Next, we need to install Visual Studio Code as our Integrated Development Environment (IDE) so that we can create and edit Java files. Go to the Visual Studio Code download webpage: https://code.visualstudio.com/download. I recommend downloading the x64 version by clicking on the "x64" button next to "User Installer" beneath the "Windows" button on the left side of the screen.
Once the file is downloaded, go to your Downloads folder on your computer, double click on the downloaded exe to install Visual Studio Code.
Please refer back to the instructions in the Warmup from Lab 1 to setup Visual Studio Code to work for our class: https://cs.oberlin.edu/~cs151/lab-1/w-part-3/
Installing GitHub Desktop
First, download GitHub Desktop on this webpage: https://desktop.github.com. Click on the "Download for Windows" button. Go to your Downloads folder, double click on the downloaded exe file to install the application.
Using GitHub Desktop
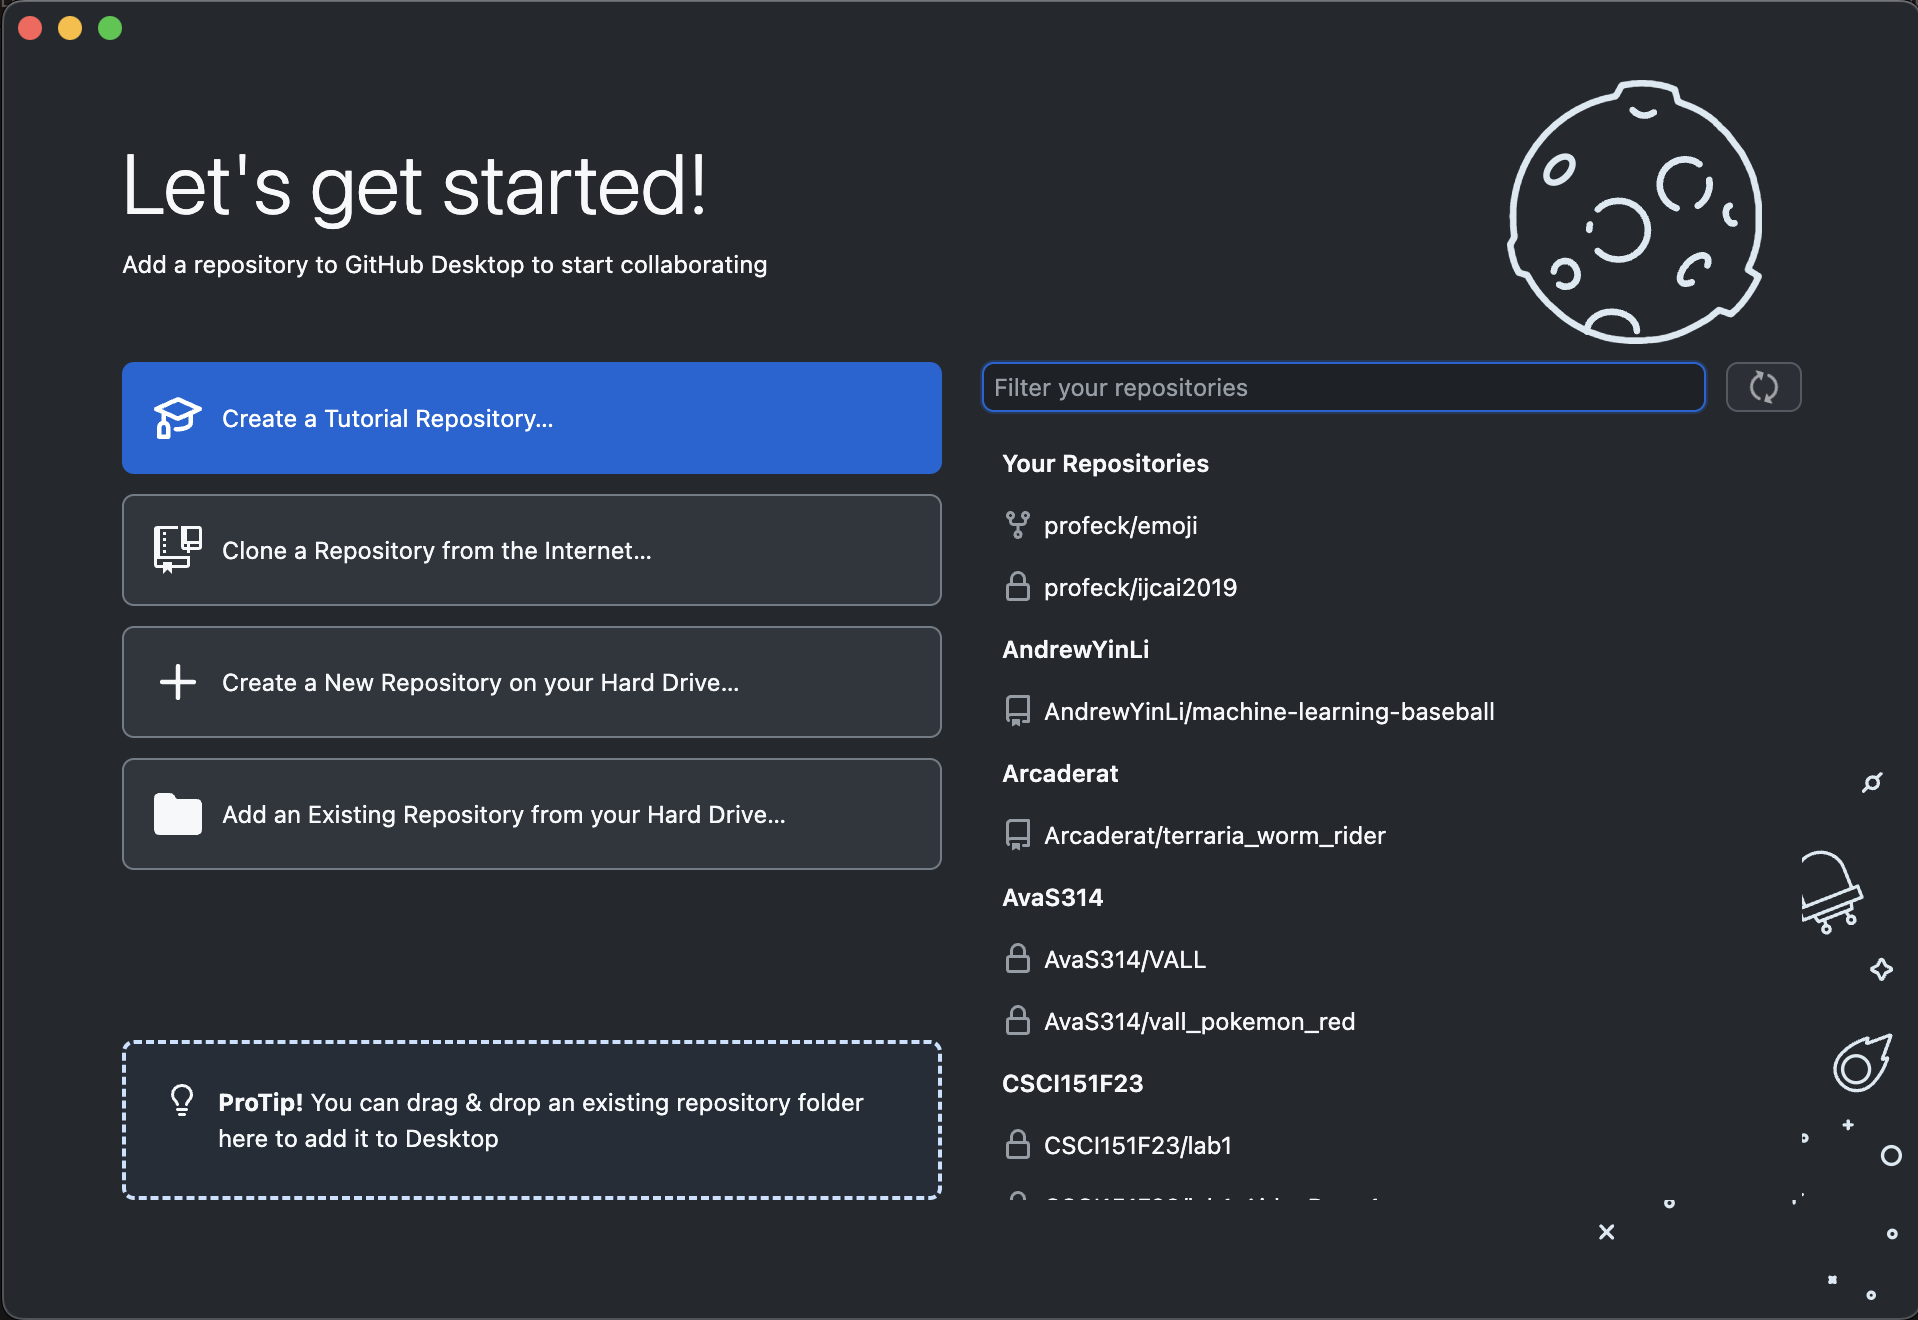
Once you have installed GitHub Desktop, the first step you need to do is login to your GitHub account. You will only need to do this once. You can do this by pressing the "Sign in to GitHub.com" button. Follow the directions in your browser, similar to what we did in the Warmup for Lab 1. Back in GitHub Desktop, keep the "Use my GitHub account name and email address" radio button checked, then click the Finish button.

To clone a repository to your computer, either click the "Clone a Repository from the internet" button on the first screen of the application, or go to the "File" menu and choose the "Clone Repository option".

In the window that pops up, lookup your respository for the current lab by searching for "CSCI151F23/lab#-XXX", where "#" is the lab number and "XXX" is your GitHub username. Click on the repository when it appears under the search box. Remember the folder name under "Local Path" at the bottom of the Window -- this is where your code will be downloaded to. Finally, click the "Clone" button. You will need to do this with each lab that you want to work on using your own computer

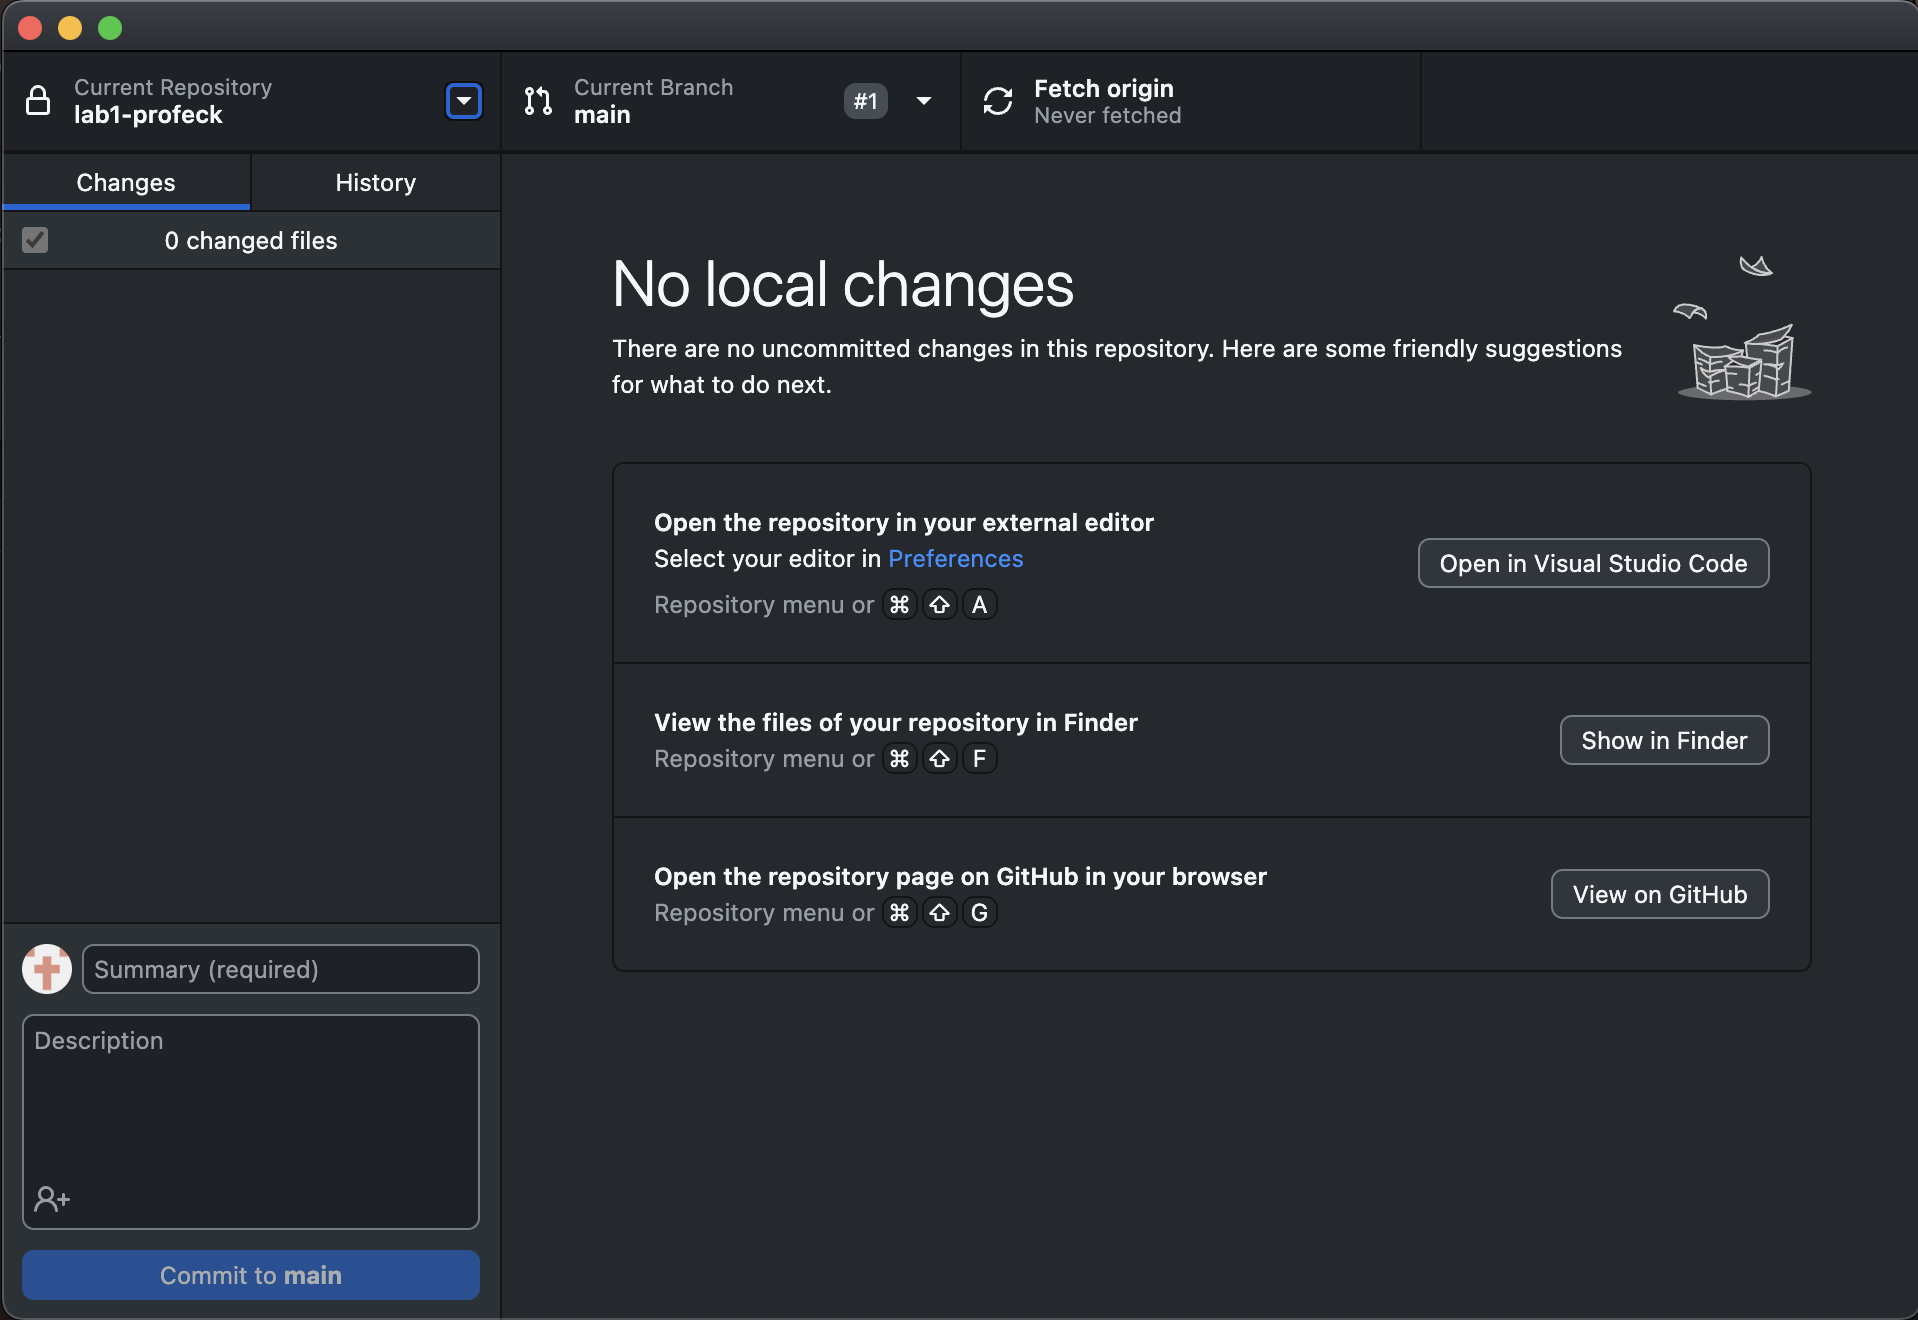
Next, you should see a screen like the following. There are several important parts here. The left top shows all of the files you have edited since you last committed your changes (this should start empty). When you have changes to commit, you can perform the equivalent of a "git add" command by simply checking the files you want to include. In the bottom left, you can create a commit message by filling in the textbox to the right of your user image (where it says "Summary (required)", then you can perform the equivalent of a "git commit -m" command by pushing the "Commit to main" button at the bottom.

Finally, you can perform the equivalent of a "git push" command by clicking on the "Push origin" button in the top middle of the application. Note: this button is only available if you have recently pushed the "Commit to main" button to commit your changes.

If you ever have files stored on GitHub that you would like to download to your computer, you can also perform the equivalent of a "git pull" command by pushing the "Fetch origin" button in the top middle of the application.

Compiling and Running Java Programs
On the lab computers, we have been using Terminal to compile and run our Java programs.
On macOS, there is an equivalent program called Terminal that you can load by holding down the Command key and pressing the Spacebar to bring up "Spotlight Search", then typing in "Terminal" and running the Terminal application. In Terminal, you can use the same cd, javac, and java commands to change your directory to whereever you cloned your GitHub repository (described above), compile your programs, and run your programs, respectively.

On Windows, there is an equivalent program called Powershell that you can load by searching for it in the Start Menu. In Powershell, you can use the same cd, javac, and java commands to change your directory to whereever you cloned your GitHub repository (described above), compile your programs, and run your programs, respectively.
