CSCI 150: Lab 1
Hello,
World!
Due:
10PM
on
Tuesday,
September 10th
In this lab you will be learning how to use the CS lab machines and create Python programs. At the end of this lab you should be able to:
- Log into a lab machine
- Create a directory for a homework assignment
- Use some basic Unix commands
- Create some simple python programs, and run them
- Learn how to get input from the user
- Submit a lab using our handin program.
The lab is broken up into sections to make things more manageable. Every section indicates how many points it is worth. Be sure to read each section carefully. With the exception of the first one, most labs are expected to take a while (8-10 hours is typical). Get as far as you can in the scheduled lab time, and try to work steadily on the lab throughout the week. Don't leave it all to the day the lab is due.
A reminder about the Honor Code - While you are encouraged to discuss the labs with each other, you should never copy anyone's code, and no one else should ever have a copy of your code. If you do discuss the lab with someone else, or look up resources online, please write that you did so above the honor code in your assignment. On partner assignments, you may work with a single partner, but no one else. Again, it is fine to discuss the lab with others, but you should never copy their code directly.
Part 1 - Setup and Unix basics
0 points
To use these labs, you'll need a CS lab account. If you registered for this class prior to today, an account should already have been created for you. If you registered late or haven't registered yet, please talk to the lab instructor or a TA.
To log in, you need a username and password. Your user name will typically be your Obie ID (the half of your Oberlin email address before the "at" sign). In rare instances (like if your Obie ID has a number), this might not be your username. Try it anyway, and if it doesn't work, Chris Mohler will be around to help you determine your username. Your initial password will be announced in lab.
Logging in
You should see a login screen with a window asking you for your username. This should not be the MS-Windows login screen. If it is asking you to press ctrl-alt-del then you'll need to hit those keys and select restart from the window that appears.
- Enter your username.
- Enter the default initial password. NOTE: You will not see your password on the screen (you might see *'s instead).
- If you succeed in logging in, you will get a message indicating that your password has expired (since it was a temporary password). You will now be prompted to create and confirm a new password.
- If your selected password is not secure enough, you may be asked to choose a new one.
- Note that you may get an erroneous message claiming you failed to change your password. This message is most likely false -- you should try logging in with your selected password.
- Now that you've changed your password, you'll be asked to login again. Enter your username, and then the new password you just chose. You should now be logged in! In the future, you will just have to enter your username and password to log in.
Web browser
- Open a web browser by opening the menu at the top left of the screen, selecting Internet, and picking Firefox or another web browser.
- The very first time you do this it may take a while as the system needs to set up your user information. Don't try clicking repeatedly, as that will just slow things down further.
- Go to the CSCI 150 home page and familiarize yourself with the policies and the course schedule.
- Create a shortcut link by dragging the picture to the left of the URL to your bookmark bar.
Create a folder for the class
Now you need a place to keep your coursework. The following instructions will walk you through the creation of a folder to store your work for this course. Items that look like this are what you should type. Anything after the '#' are informational comments. You need a "terminal" where you can type. Click on the Applications Menu (probably at the top left of your screen); the first icon is probably a Terminal Emulator. Click on this and a terminal will open on the screen. There are also several terminal options in the Accessories submenu. Type the following (without the comments):
    cd                 # changes the current directory to your home directory

    pwd                # prints out the directory (to verify where you are)

    mkdir cs150        # creates a directory named 'cs150'

    ls                 # lists the contents of your current directory

    cd cs150           # changes your current directory to the one you just made

    pwd                # prints out your current directory
Now you'll create a folder for this week's lab. You'll be doing this for each of your lab assignments.
    cd                # goes back to your home directory

    cd cs150          # goes into your class folder

    mkdir lab01       # creates a folder for this lab

    cd lab01          # goes into that folder

    pwd               # should show that you are in that folder
Part 2 - Create your first Python program
helloworld.py: 4 points
As your first assignment, you're going to continue a ritual that has been around since the early 1970's -- starting to explore a programming language by first creating a program that prints the words "Hello world!" to the screen. In this course we'll be learning the Python programming language, and using a program for editing code called Atom. But before we get to that, let's take a step back and look at the overarching process of developing a program.
There are six steps involved in creating programs in Python (or in any other programming language).
| Specify the Problem |
Before writing a program, you must first decide what your program is meant to do.
This may seem obvious, but it is surprising how often this critical step is ignored.
You should know what the goal and function of the program is.
Generally, the problem description will specify what the inputs to the problem are,
and what the desired outputs and behaviour are. In CS 150, this will typically
be given to you as part of the lab specification.
For your first program we'll just be creating a program that takes in no inputs, and outputs "Hello, world!" to the screen. |
| Understand the Problem |
Try some examples, that is, solve the problem (by hand) for a variety of inputs.
For one, this will either confirm or deny that you understand what problem you are
trying to solve. Furthermore, by trying examples by hand, you may get ideas for
how to approach the solution for the problem.
For our HelloWorld program, the specification is pretty simple and doesn't depend on input, so there isn't much to understand. But even for marginally more complicated programs, this step becomes critical. |
| Design an Algorithm |
Once you know what problem you are trying to solve and have a feel for its
intricacies, you can begin to think about the steps your program will need to take.
This set of steps constitutes an algorithm. For all but the simplest of programs,
you should have a fully specified algorithm (in pseudocode, a mixture of code-like
English and math) before you even think about programming. Exactly how an
algorithm should be specified is something you'll get practice with during the course.
For our first program, the algorithm can be specified quite simply: Print "Hello, world!" It's worth noting that the three steps we've discussed so far do not involve programming a computer! A common rookie mistake is to jump into code too fast, with minimal understanding of the problem, and even less of an idea how to solve it. |
| Implement a Design |
Once an algorithm has been specified, we need to translate those steps into Python
source code and save them to a file on the computer. This is done with a text
editor. In principle, any simple text editor would suffice, but we'll be using an
editor called Atom. Atom is a text editor
specifically intended for the creation of Python programs. As such, it has a
number of functions that streamline the process of editing code. For example,
Atom color-codes terms and instructions based on their meaning and suggests
helpful indentation, both of which make reading programs easier.
Creating a fileIf you've been following the lab carefully, you've already created a lab01 folder, and are currently inside that folder in your terminal window. If not, back up and do that. Next, we will load the Atom editor (which is the program we will use to write our programs in this class). To do so, click on "Applications" -> "Development" -> "Atom" (as illustrated in the following picture) 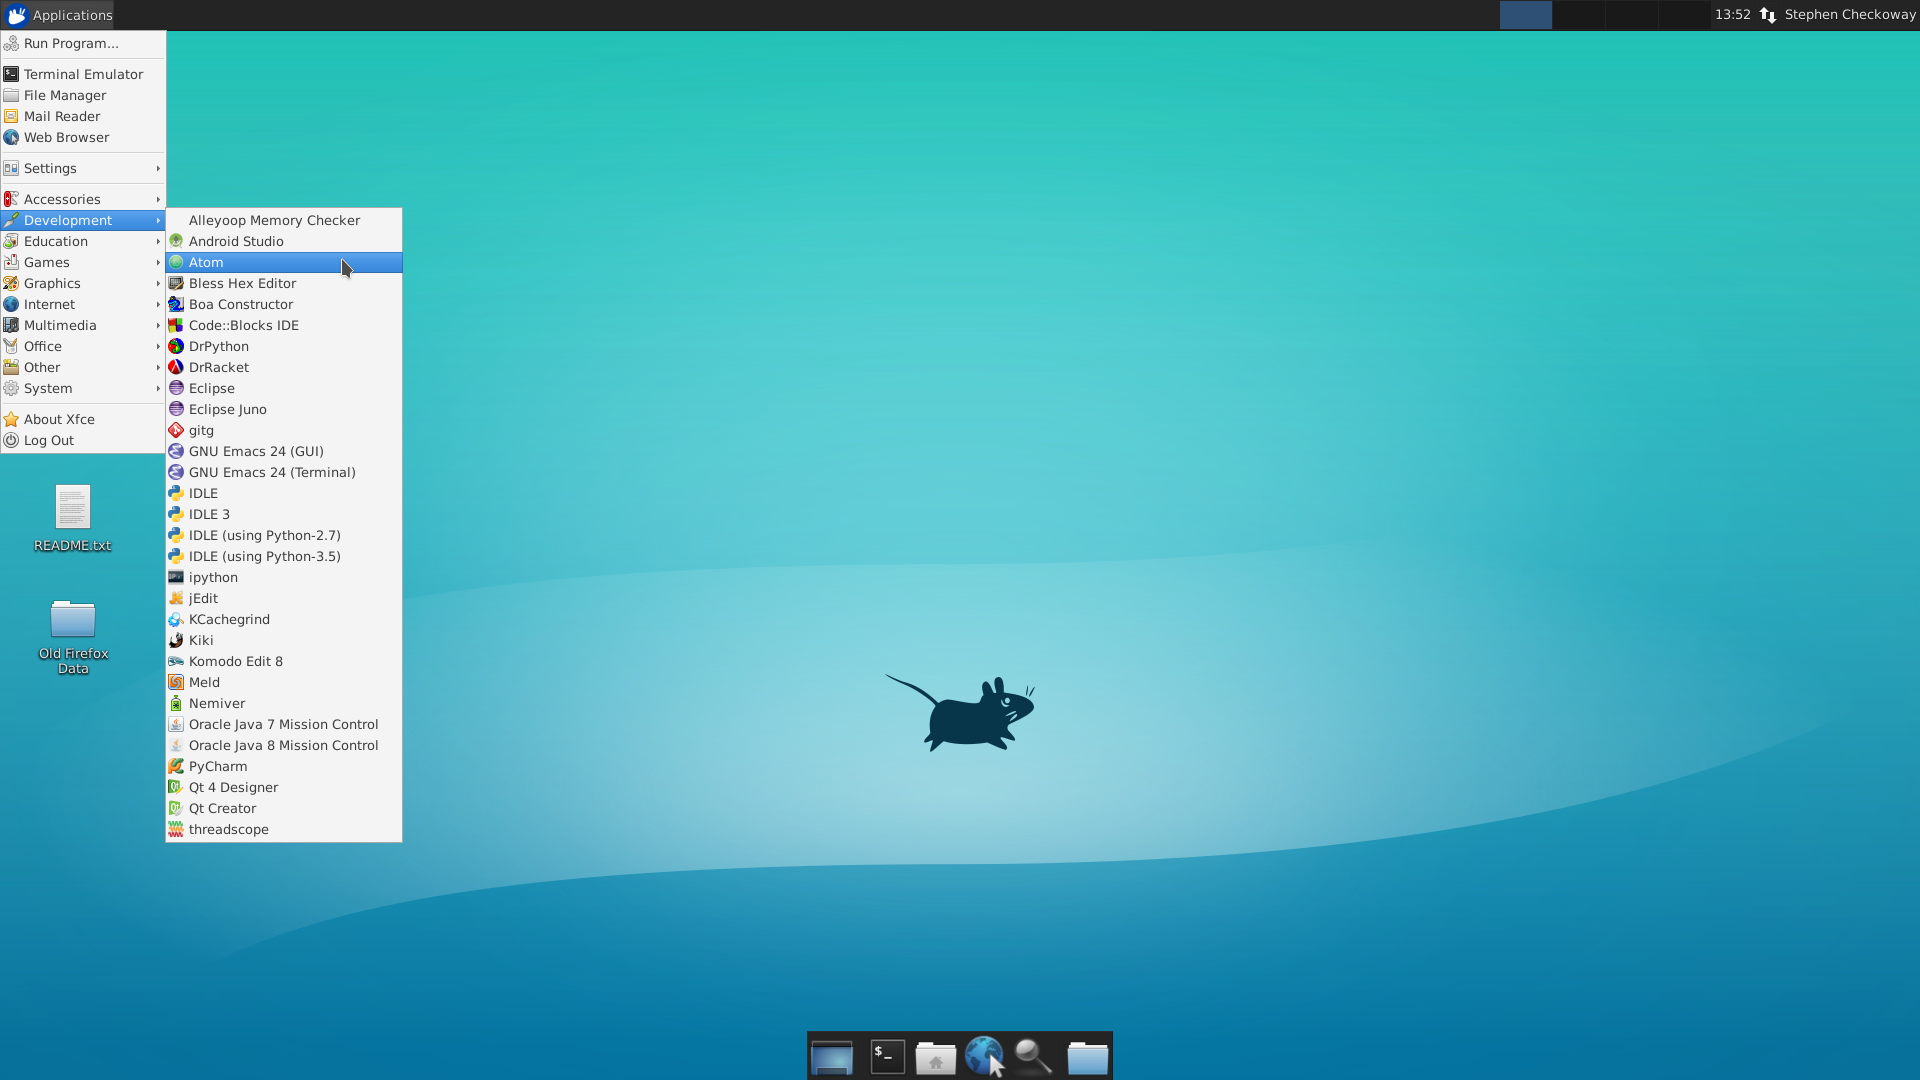
If this is your first time using Atom, then there will be an information screen that you can ignore for now (you may want to do some tutorials later, up to you). Next, create a new program in Atom by clicking on the "File" menu, then choose "New File". Immediately save the new file by clicking on the "File" menu again, then choose "Save As". Click on your user name on the left side of the pop up window, double click on your "cs150" folder, then double click on your "lab01" folder. Type in a name of helloworld.py in the pop up window, and click the "Save" button. You will now have a program called helloworld.py inside your cs150/lab01 folder! 
Now, back in the main window of Atom, type the following: If you type "ls" in your terminal window you should see one file: helloworld.py. The command "ls" gives you a list of the files in a directory.
ls # show the files
|
| Test the Program | The execution of your program is where
you get to see the fruits of your labors. For more complex programs, you should
try running your code on a variety of inputs, including the examples you
generated to further your
understanding of the problem (step 2 of this list.) If the program does what
you intended, congratulations! If not, you may need to either go back to the
Implementation phase (if you failed to implement your algorithm properly),
or back to the Design phase (if your algorithm itself contains a flaw).
Running your ProgramYou should now use the command
python3 helloworld.py # run the program
The output
Hello, world!
should appear in the terminal window. If everything went as planned, congratulations! You've just edited and executed your first Python program! If there were any error messages, just go back to editing the file and try to make it look like the example above. |
| Maintain | Even after you have a running program, you should keep on developing it in response to the needs of your users. Although you don't have clients to answer to in this course, it is good to get in the habit of writing code that can be easily maintained, so we will encourage you to think about this step. |
So what is happening in our (admittedly simple) program? All text that appears after the hash tag (#) is a comment. Atom colors comments gray. Comments are ignored by the computer and thus have no effect when the program is run. They are just notes you can leave for yourself and anyone else who ends up reading your code. Making good use of comments is an important skill that we'll talk more about as the course progresses. A standard convention is to have a comment header at the beginning of any program that states the name of the program, its purpose, the author (you), and the date. All your programs should begin this way.
The only actual instruction is a call to the print function. Its purpose is probably evident; it prints whatever is specified within the parentheses. The text is contained within double quotes, which is Python's way of indicating that the text is a literal string of characters, and should be printed just as written (as opposed to a variable or instruction).
You can now experiment with your program. Try changing the contents of the string that is printed, and making a second copy of the print statement. Just be sure to revert to the original working version before you hand it in!
Part 3 - Callsign
greetings.py: 4 points
fancy.py: 8 points
This will be the first program in which we get input from the user. Start by creating a file greetings.py, the same way you previously created helloworld.py
Add header comments like in your previous program (name, date, etc.). To get input from the user, the first instruction we'll need is the following:
name = input("Enter your name: ")This should be somewhat familiar; it's just an assignment statement. The expression on the right hand side is a method invocation that uses a built-in python function (input) to get a string from the user. That is, when the program gets to this statement, it will print the statement in the parentheses and wait for the user to type something and hit enter. Whatever the user types before hitting the enter key will be returned and stored under the variable name. After the value is assigned, you should print a greeting with a statement such as
print("So, we meet again,", name, "!")Notice that we didn't need to add a space after the comma (the comma after "again"), because Python inserts a whitespace delimiter automatically. Of course, it will also automatically insert a space before the exclamation point... but we'll fix that in a bit. Also, recall that the commas around name concatenates the Strings in this case.
Just to confirm, your greetings.py should look something like this, and when you run it, it should ask the user to enter their name, and then prints "So, we meet again, <their name> !"
Now create a program called fancy.py which prompts the user to enter three strings, one at a time, in the following order: First name, last name, and nickname. It should then print "Welcome back, <first name> *<nickname>* <last name>!" For example, assuming Cynthia enters her info correctly, it should print:
Welcome back, Cynthia *Destroyer* Taylor!
To remove the whitespace before and after the nickname, you'll need to including sep='' at the end of your print call. Similarly, if you don't want a newline after the print statement, you can add end=''. For example, the statement
print("no", "white", "space", sep='', end='')
will generate
nowhitespace
all on one line, and the cursor will be at the end of that line (not on the next one.)
Part 4 - Modify a Program
simple.py: 7 points
compounding.py: 7 points
In finance, there are two popular ways of calculating interest earned on savings and/or loans. The difference is in the formula used and how often interest is "earned". In this part of the lab, we will explore both.
Simple Interest
The formula for simple interest earned is

Your goal is to write a program that asks the user for three numbers:
- p: an amount of money to invest in savings
- r: an interest rate you will earn on your savings (paid by the bank for lending them the money)
- t: an amount of time (in years) that you will keep the money in savings
then outputs to user the amount of money they would earn in simple interest. For example, one run of the program might be:
Sample Output
    Welcome to my amazing simple interest prediction program!

    How much would you like to save? 1000
    What is your interest rate? 0.05
    How long are you saving the money? 2

    Your interest earned would be $100.0!
Notes: You will want to "convert" the user inputs into decimal numbers because by default, what the user types is considered a string literal. You can do this by using the built-in Python "float" function float(string-you-want-to-convert-to-a-decimal-number)
p = float(input("How much would you like to save? "))Also, do not worry about rounding your final output to the nearest cent -- it can have as many decimal places as it calculates.
To multiply x by y in Python, use x*y.
You should test your progam to make sure it's calculating the correct interest amounts. Try a variety of numbers for each input to see if the output matches what you calculate by hand.
Continuously Compounding Interest
A second option for calculating interest is to continuously compounding interest. The formula for this type of interest earned is

This formula awards interest constantly (more often than every second!), rather than at the end of the savings. As you might imagine, this earns a great amount of interest to the saver, so it is rarely used for savings.
It will be helpful to know that in
Python, if you want to raise the value
x to the power of n, you should
type x**n. So x squared
would be x**2.
Your goal is to copy your simple.py program to a new file called continuous.py and change the formula used to calculate the interest earned to the continuously compounding interest formula. For example, one run of your program might be:
Sample Output
    Welcome to my *even more amazing* continuously compounding interest prediction program!

    How much would you like to save? 1000
    What is your interest rate? 0.05
    How long are you saving the money? 2

    Your interest earned would be $105.17084373602802!
Don't forget to test your program on a variety of values of inputs.
Part 5 - Time Warp
secondcoverter.py: 10 points
In this problem, we'll think about converting units of time. Suppose we have some number of seconds stored in a variable called sec, which may have a value of 60 or greater. Since we're typically not used to thinking about how long 795 seconds is, we might like to improve readability by formatting the time (sec) into minutes and seconds (m and s) such that s < 60. For example, if sec = 137, then we'd like to compute m = 2 and s = 17, since 137 seconds is the same as 2 minutes and 17 seconds.
Describe the Problem:
The problem we are trying to solve is as follows.
Input: get a non-negative integer sec from the user, representing some number of seconds.
Goal: convert sec into its equivalent hours, minutes, and seconds, and output the result to the terminal window.
Understand the Problem:
For example, if the user enters 137, the output should read
137 seconds is equal to 0 hours, 2 minutes and 17 seconds.
Or if the user enters 3601, the output should read
3601 seconds is equal to 1 hours, 0 minutes and 1 seconds.
Notice I'm ignoring grammatical issues such as "hours" vs. "hour".
Design an Algorithm:
The program has 3 main steps:
- Get the number of seconds from the user, store in a variable named sec.
- Calculate the number of hours (h), minutes (m), and seconds
(s) that are in sec, where m < 60 and s < 60.
The mod, or remainder operator (%), as well as the integer division operator
(//) will be particularly useful here. We'll be talking about these operator
in class soon, but if you'd like to get started on this section of the lab now, you can
either check out Chapter 3 of the text, or read on.
Integer Division ( // ) and Remainder ( % )
Consider dividing fourteen by four, i.e. (14/4). We'd normally say we 14/4 equals 3.5. But we could also think in terms of "integer division", where we'd say 14/4 equals 3 with a remainder of 2.
In Python a single slash means real division, so 14/4 evaluates to 3.5. A double slash, however, gives the integer component of integer division, and thus 14//4 evaluates to 3. The mod, or remainder operator, is invoked with the percent symbol, and gives whatever value is left over after the integer division. So 14%4 yields 2. More generally, x//y evaluates to the number of times y goes wholly into x, and x%y evaluates to what's left over afterwards. These operations turn out to be surprisingly useful, as we'll now see.
Since this step of the algorithm is a bit more complex than the previous one, we'll break it into three sub-steps, one for each variable that we're calculating.
-
Set s = sec % 60. To see why, note that s should be the number of extra
seconds that aren't used up by whole minutes. That is, s should be whatever
remains after we divide sec by 60 to get minutes, which is exactly what
sec % 60 means.
-
Set m = ??? (This part is for you to figure out. Before you start programming.)
- Set h = ??? (This part is also for you to figure out. Likewise, before you start programming.)
-
Set s = sec % 60. To see why, note that s should be the number of extra
seconds that aren't used up by whole minutes. That is, s should be whatever
remains after we divide sec by 60 to get minutes, which is exactly what
sec % 60 means.
- Print the equivalent number of hours, minutes, and seconds for the user.
Implement a Design:
Create a program called secondconverter.py that implements the design above. If you want you can start with the following code in a file named secondconverter.py, and fill in the necessary code under each corresponding comment.
Program Outline
# secondconverter.py
# Translate seconds into a more readable hours, minutes, and seconds.
#
# <your name>
# <today's date>

# Explain on the terminal (via the print function) what this program does.


# Prompt the user to enter a number of seconds, store in a variable.


# Compute hours, mins, and seconds for this input.


# Print the results.
Note: to ask the user for a whole number, we want to use the following (similar to how we asked for a decimal number above):
sec = int(input("How many seconds have you got? "))
Test the Program:
Test your program by trying a variety of inputs. You can start with the example below, but you should try others as well, especially numbers that you think could be troublesome.
Sample Output
    Welcome to my Second Converter!


    This program will properly calculate the number of

    minutes and seconds under 60 from a given number of seconds.


    How many seconds have you got? 3601

    3601 seconds is equal to 1 hours, 0 minutes and 1 seconds.
Part 6 - Wrap Up
In every lab, your last job prior to submission is to complete a brief Google Form. This is a chance to reflect upon what you've learned, and give us some basic feedback. You can find this lab's form at this link.
Please do not forget to fill out the Google Form after each lab, since this is where you will sign the Honor Code for each assignment.
On some labs, there might be an extra question or two for you to answer in the final Google Form. In this lab, you are asked the following question about how you might maintain your secondconverter.py program: Suppose that in ten years the world leaders decide that a minute should have 80 seconds and an hour 80 minutes. What changes would you need to make to your program to make it accurate?
Part 7 - Handin
You now just need to electronically handin all your files. This will make a copy of your files available to the instructor and the graders. If you make any changes after you have handed in your work, we won't see the changes unless you hand them in again. You can handin as many times as you need to. (In fact, it is good practice to handin every time you logoff. This way, there is always an up-to-date copy in the graders' directory, and if anything happens to your files (as sometimes does) you won't lose all of your work.)
    cd                 # changes to your home directory

    cd cs150           # goes to your cs150 folder

    handin             # starts the handin program

                        # class is 150

                        # assignment is 1

                        # file/directory is lab01

    lshand             # should show that you've handed in something
You can also specify the options to handin from the command line:
    cd ~/cs150        # goes to your cs150 folder

    handin -c 150 -a 1 lab01
File Checklist
You should have submitted the following files:
- helloworld.py
- greetings.py
- fancy.py
- simple.py
- continuous.py
- secondconverter.py
Part 8 - Lab Access
If you are already registered in the class, your ID card should have swipe access to King. This means that you should be able to get into King at all hours on all days. If you haven't registered yet, or registered late, you should go see Jackie Fortino in King 223, pronto, so that she can get you the right access.
Also, you need a code to get into both of the CS labs (King 201 and King 135). We announce this during the first lab, so if you don't know the code yet you should probably ask us.
That's it! You've completed your first lab. Be sure to log out when you are done (either the red-arrow icon at the bottom of your screen, or System->Logout).