CS-151 Labs > Lab 0. Setup
Part 1. Eclipse IDE
You learned how to compile and run a single Java class from a command line. To be able to build more complex projects containing multiple classes and resources, we will learn how to use the Eclipse IDE (Integrated Development Environment).
- Intellysense: suggests the names of the methods and variables, reducing the chance of a typo.
- Automatic compilation: compiles all the Java classes in the current project.
- Error highlighting: highlights all the compilation errors.
- Debugging: has an outstanding set of graphical tools for debugging and locating logical bugs.
Start Eclipse
You can start Eclipse using Terminal:
% eclipse &
This will start Eclipse in the background, which means you can continue working in the terminal: the Eclipse will run as a completely separate process.
When Eclipse starts up it needs to connect to a workspace. It will make a suggestion for this workspace and you may just accept whatever it suggests. Click the button that says “Launch Eclipse”.
Once Eclipse is running, its icon appears in the taskbar on the left. If you want to simplify your life in the future, you can add Eclipse to favorites, and it will always be available in the taskbar.
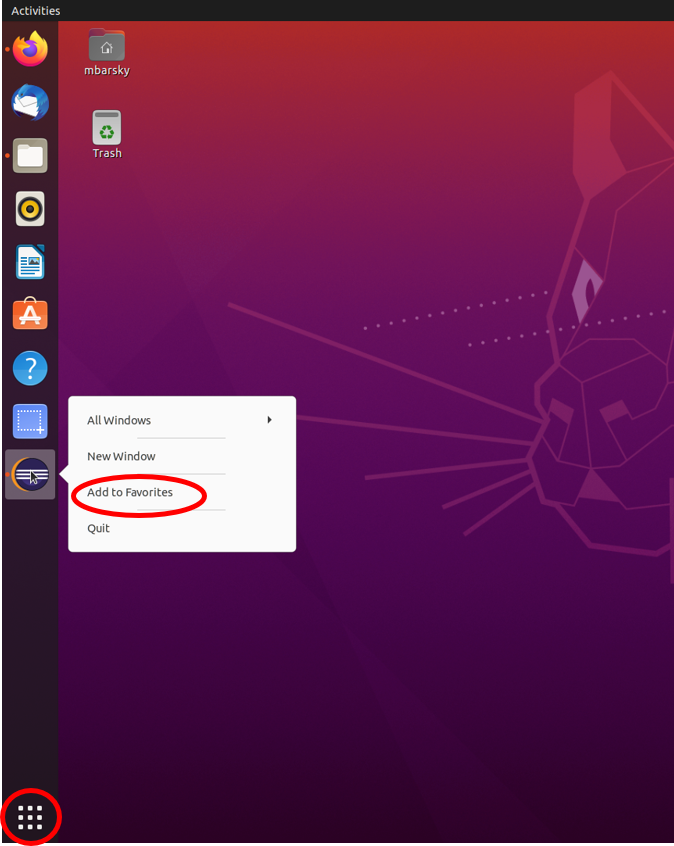
Alternatively, you can open any program in Ubuntu using Graphical User Interface. The first option: press the checker button in the left bottom corner of the screen, and then select tab “All applications”. Here you will find gedit, Eclipse and many other useful programs and utilities, which can be invoked by a double-click.
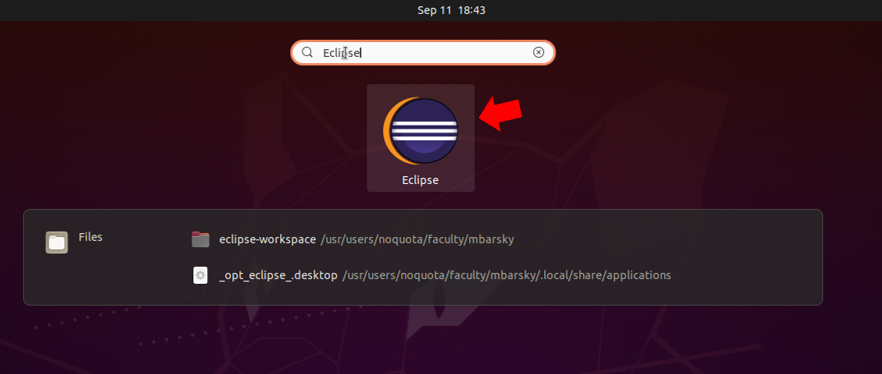
The second GUI option is to search for the desired program. On the keyboard press the Windows button (located in the bottom row to the left). This brings up the search box. In this box type eclipse. This will bring up Eclipse icon, and you can press on it.
Create a new Java Project in Eclipse
During the warmup you have created a folder called lab0. This is going to be the folder for all your Lab 0 work.
Create the Java project
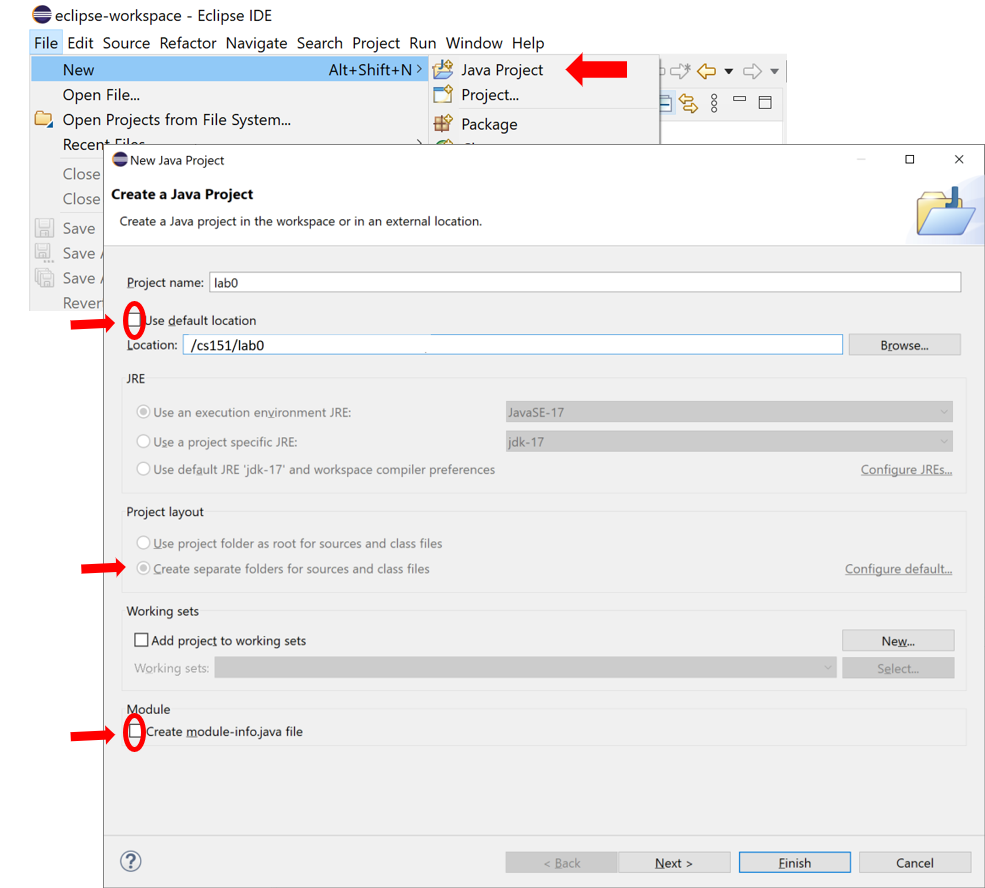
in Eclipse by selecting File > New > Java Project. Give it the project
name lab0. Uncheck the Use default location box. After you uncheck
this box, the Location textbox becomes active. Use the browse button to
select the lab0 folder you created at the start. Make sure Create
module-info.java is unchecked. Click Finish.
Add existing files to the project
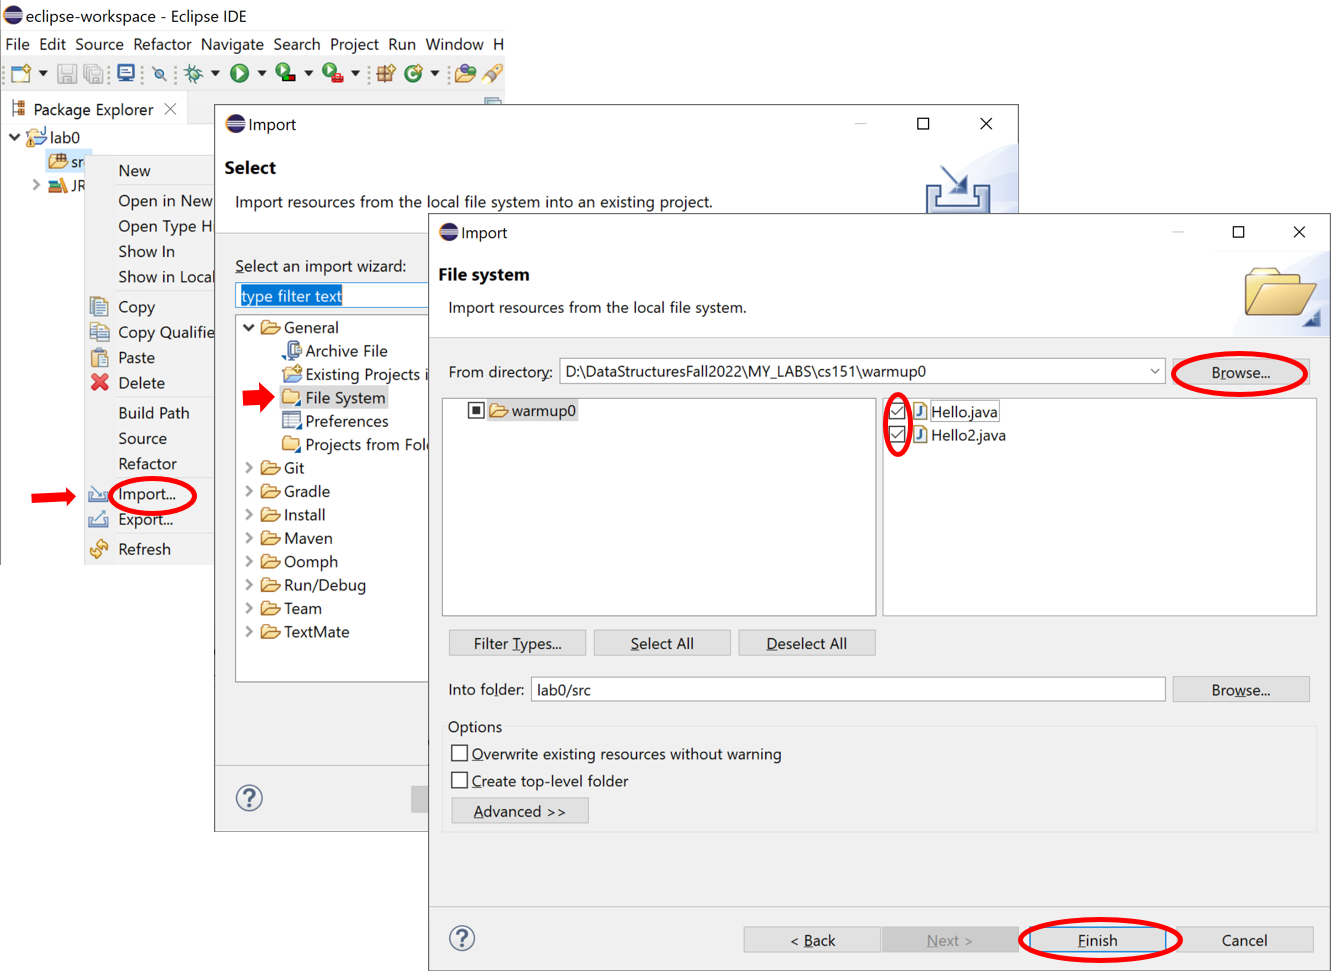
On the left you see the Project Explorer, which shows all the files for the project lab0. There are currently no files, but there is a folder called src. This is the place to add the source code files with extension .java.
Right-click on the src folder and select the import from the dropdown menu. In the dialog box select General->File system import wizard. Navigate to the warmup0 folder, check both Hello.java and Hello2.java and add them to the project.
The file names should appear in the Project Explorer under the src/(default package) folder.
You can now view, edit and run Java programs – all in one application.
To see Hello.java source code, double-click on the file name.
To run it: select Hello.java, right click - Run As Java application.
You can see results in the console which is at the bottom of the Eclipse window.
Notice that you did not need to explicitely compile your program - Eclipse automatically compiled both classes for you.
Command-line Arguments
Now let’s run Hello2.java (right click - Run As Java application).
We get an error message, because the program expects two strings passed as command-line arguments.
But how do we pass program arguments in Eclipse?
We do this by editing the Run Configuration.
Right-click the file name, and select Run As -> Run Configuration. Select the name of the Java file on the left, tap on Arguments tab, and in the box for program arguments type Alice Bob. Press Apply and Run. The program should now print personal greetings for Alice and Bob.
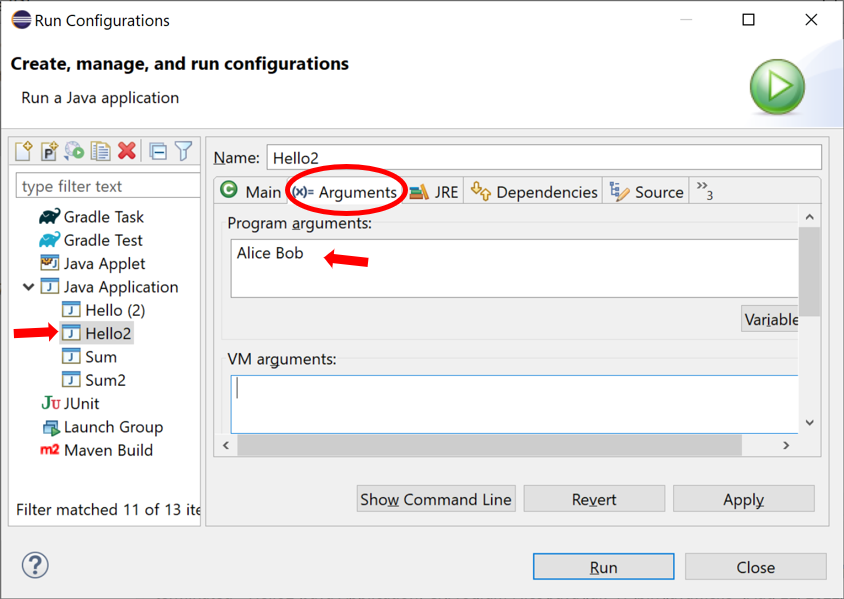
Note. Sometimes the desired Java file does not appear in the configuration screen. For it to appear, you neet to Run the program at least once.